Reader Design Dilemma: My Solution

A while back I ran a blog series where readers would send me design dilemmas and I would give a few  problem solving suggestions. Last week a reader emailed me about her family room dilemma. When this email hit my inbox I knew it would be fun to share with you.
A little about the space. 

“My family recently moved into the home where my husband grew up; after seeing it decorated to my Mother in law’s tastes for so long, I’m having a hard time making confident choices of my own. I have a tiiiiny budget, but I’ve GOT to get something on our walls to add personality and reflect US or I’m going to go nuts! What would you suggest for the space pictured?”
 

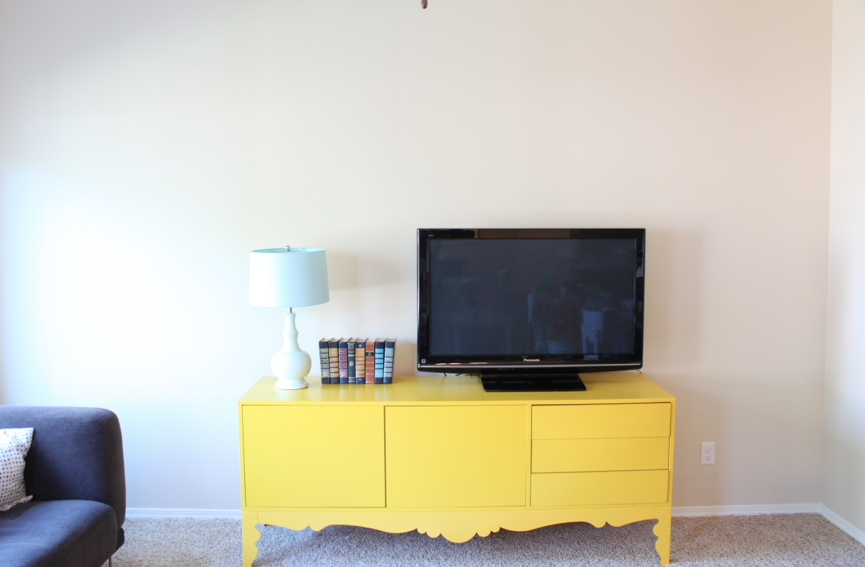
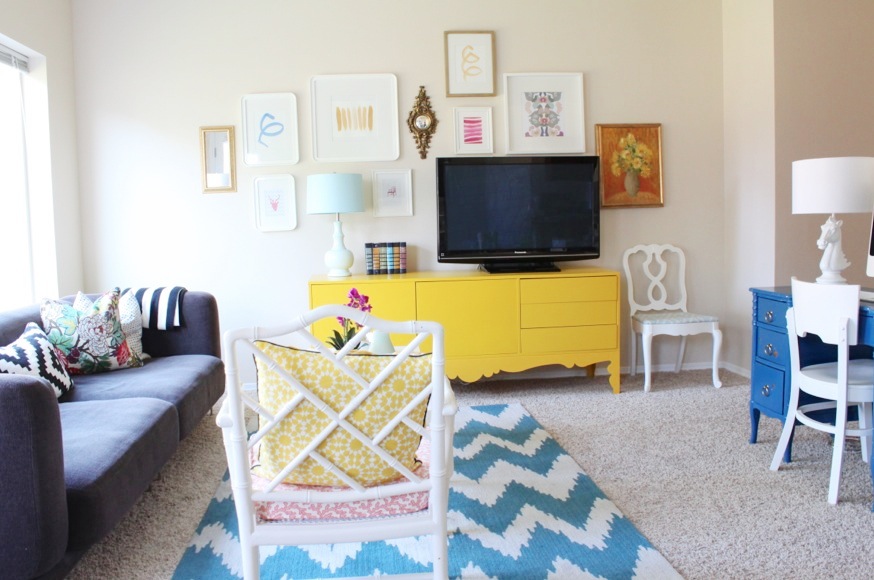
I don’t know much about her style, but I did notice she already owns a few really cute pillows. A grey chevron, blue scalloped, and even a Caitlin Wilson floral pillow.
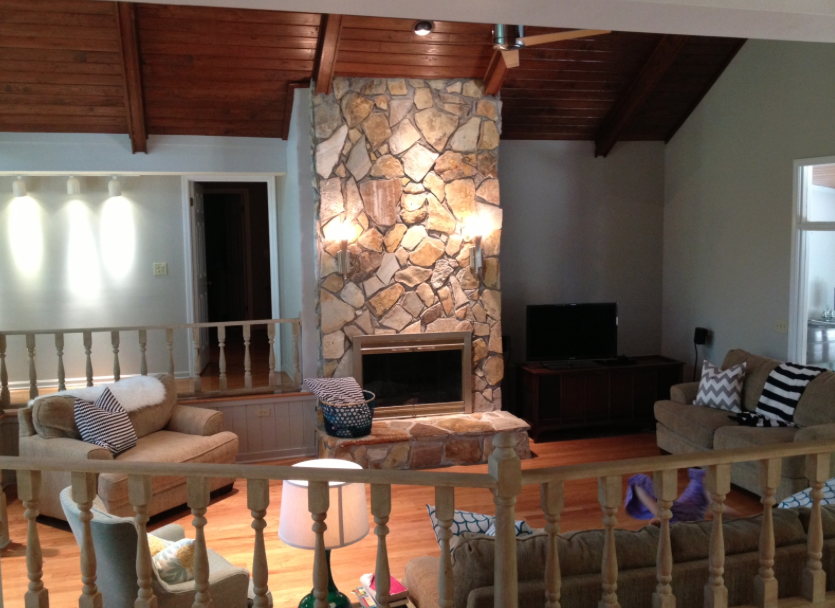
So I decided to take a fresh, graphic, and modern approach.
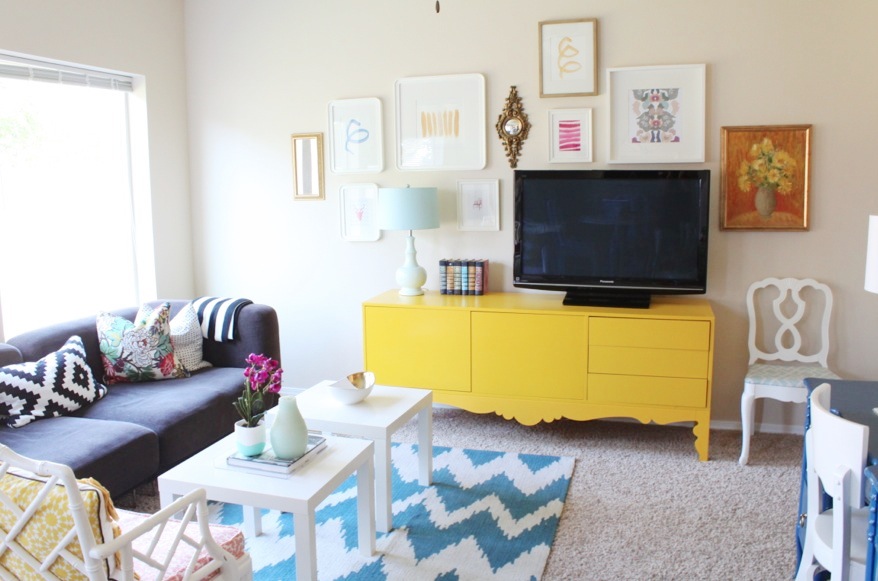
Since the budget is small (can’t we all relate) I wanted to get the biggest bang for my buck. Nothing stretches your dollar quite like paint! Stripes for the walls, a graphic black & white DIY painting on the fireplace (tutorial here, thanks Sarah for the room inspiration!), painted turquoise television stand, sunbust mirror, and playful art!
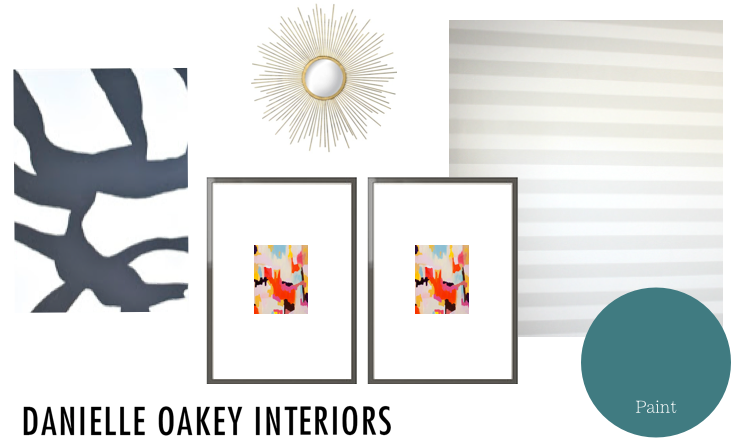
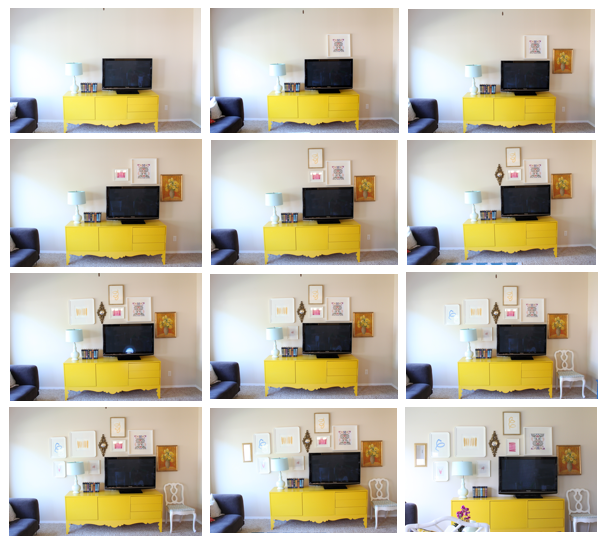
Here is a breakdown of my plan.
And now for my very very amateur photoshop job…
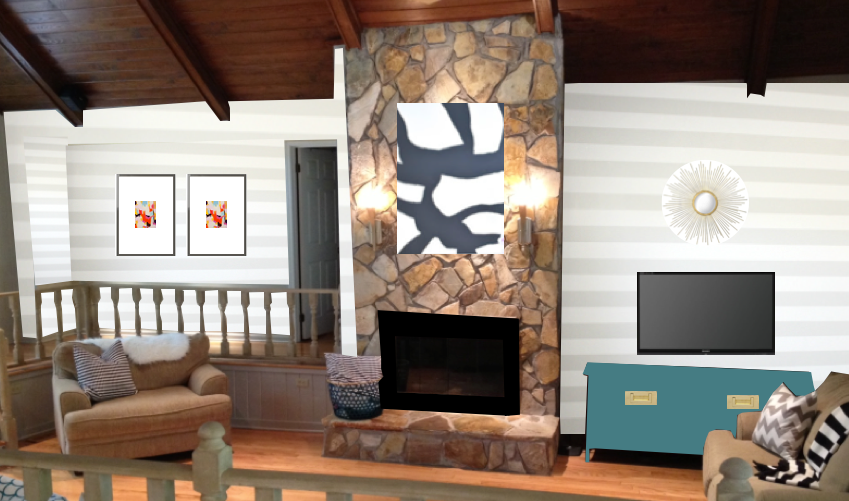
Wow, my photoshop skills are awful…but you get the idea.
 I think that spruces up the space a little, don’t’ you?
Best part, it could all be done for under $150.00 and a little elbow grease.
Clearly this is not the only solution to this dilemma, so let’s hear what you would do.
What was your first thought? Would you keep it more simple? Go more bold? Let’s give this family some options!
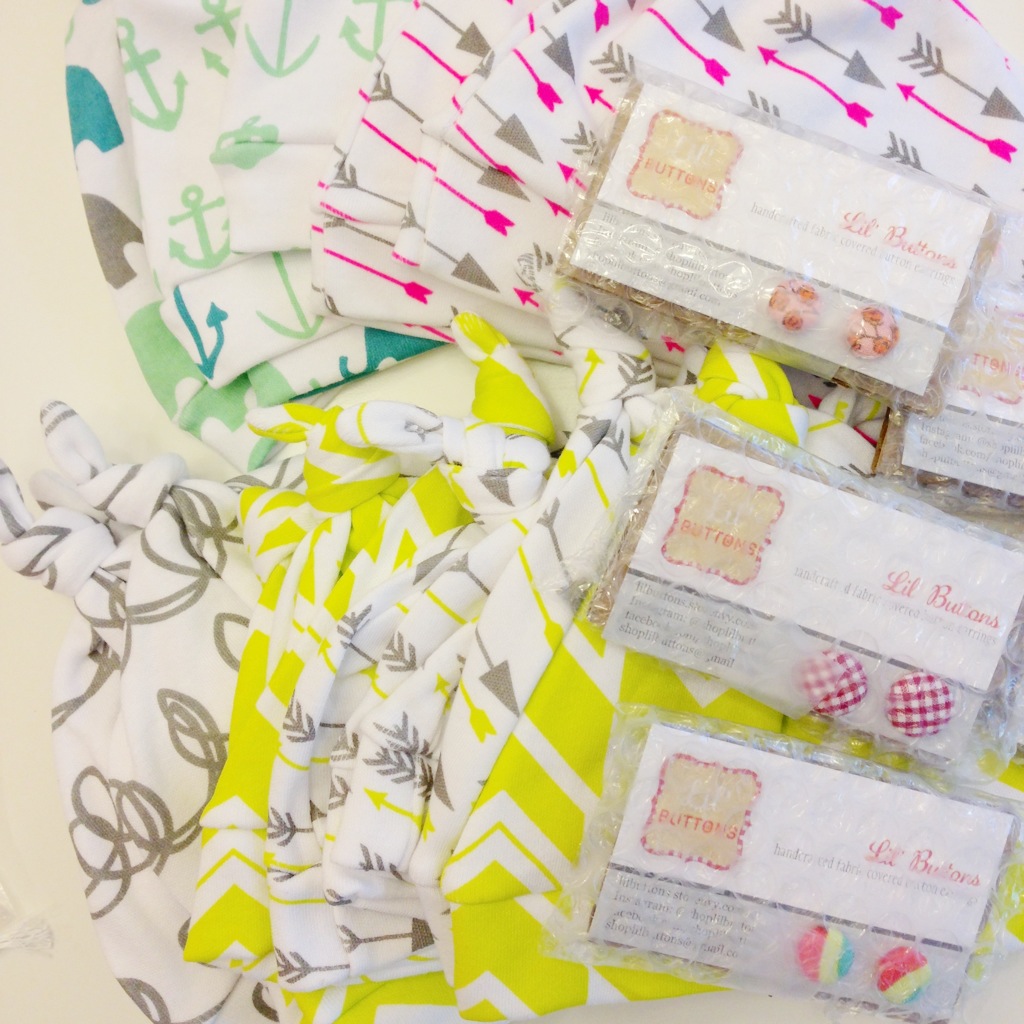
Also, today on Instagram I will teaming up with Livy Love Designs & Goods by Grinn for a giveaway! We will be giving away 3 prints, 2 pillow covers, and an online design valued at $300.00 to one lucky winner! Follow me on Instagram @danielleoakeyinteriors for more details on how to enter!
xo,

A Blog Tour

I am sure you have noticed that things look a little different around here.
I got a blog makeover, cleaned things up a bit, and hopefully accomplished my ultimate goal of making things a little easier to find!
First, although I loved the look of my last blog design, I was ready for something a little simpler. 
Simple is what I got and I love it. 
For the design I purchased a pre-made template from Shiny Magic on Etsy. I am in the midst of saving up for a big blog revamp and hope to switch over to a .com, so a $70.00 template was perfect for now. The process was awesome, I purchased the design one afternoon and 24 hours later she had it ready to go!
Let me show you around…
Same as before, you can find all my pages right below my header.
I have done my best to update each page. 
I’ve added new pictures and a little more detail about my life and design business on my About Me page. I mean, I do think it’s time we become a little more familiar with each other right? 
Getting a new headshot is definitely on my to-do list.

I FINALLY updated my portfolio page. Although I still have several spaces that need to be photographed, it’s nice to be able to see some of my work all in one place. 
I added a button on the right-hand side of my blog that links directly to my affordable furniture shopping guide. You simply click on the picture and BAM you are there.
Gosh I love Glossi, such a great company.
I know you are on the edge of your seat by now, but hold on because it is about to get real crazy up in here.
I have fully updated my DIY Projects page! What? Can it be?
I actually surprised myself with how many DIY’s I have done. Apparently I like them.
If you are new around here, you might want to check them out.
And my personal favorite addition, I added some of my popular posts to the right-hand side of the blog.
I am also going to be introducing a few new design services in the next few months.  Hopefully something that will work for all types of budgets.

^^^oh, and I now have a cute little signature, how fun.

Project Stay Happy Update!

I am overwhelmed by the response I have received for Project Stay Happy!
Just thinking about it makes my heart swell and my eyes water.
Everyday I have boxes on my doorstep and packages in my mailbox.
It is a wonderful thing.
I honestly can’t even find the words to describe my feelings when I see a pile full of packages leaning against my front door. It is the happiest kind of mail I tell ya.

I know that each donation will mean SO much to every mother that receives a package.
 I wish I could send a package to every woman on bedrest, they so deserve it!

I spent last night organizing donations and figuring out what else I need to make each package perfect.
I honestly love each and every item donated. The generosity of people is incredible and so inspiring.
I will be sending out the packages at the beginning of October. Which means if you are wanting to donate, there is still time. I hope to send out as many packages as possible!
One more thing. I would love to add a small book filled with words of encouragement to each care package. When I spent my time on hospital bedrest, there was nothing I enjoyed more than hearing success stories from former bedrest graduates or receiving a card in the mail telling me that I can do it!
So this is what I am asking from you…
If you happen to be a former bedrest graduate, I would l love for you to send over some words of encouragement. This could include a quick re-cap of your bedrest story, or even just some positive thoughts. 
Even if you were never on bedrest, I would still love to add your note to the book. So feel free to send them my way! You can simply email them to me (danielle.oakey@gmail.com) and I will print and makes the books. Easy right?
Thank you, thank you, thank you. 
I could not do this without all of you.
xo,
Danielle

30 Minute Gallery Wall!

I am embarrassed to admit it, but the walls in my home have remained empty for the last 3 months. When we first moved in, I unpacked everything except for our picture frames, mirrors, and art.
I knew I eventually wanted to hang them, but I didn’t have any clue where.
After a couple months of living this way, my husband started to ask if I was ever going to get to it. Can this be? My husband asking ME to decorate? Clearly I have trained him to enjoy a decorated home. 
I was originally planning on using temporary stenciled panels on this wall, but I couldn’t come up with a design that felt right. 
I was also sick of tripping over stacks of frames, so last week during Theo’s afternoon nap I sealed the deal.
I wish I had a secret method to my madness, but it really is just madness.
I don’t measure or plan, I like to just go with the flow.
For those of you who do like a plan, you can download my gallery wall template here.
Now my yellow credenza doesn’t look so tiny on that massive wall.
I am in love.

If you are wanting to know the order which I hung, I took step by step pictures as I went.
I pretty much started on the right and worked my way over.
I do like how it helps the TV blend in a little!
Now I need to switch out some of the art since a few pieces are hung sideways.

And just for fun, another before and after!
I also desperately need to get a rug that fits the space.
But it’s a start right?!
Also, I have already added more items to my affordable furniture shopping guide, including sofas under $800.00 and a page featuring what I am loving on sale!
To be honest, I am having way too much fun making these!