Inspiring Home Tour

I am loving Devin Dyer’s home tour featured over at Glitter Guide.
I adore everything about this little home tour, especially her sofa. Every time I am visit Z Gallerie, I crush on the Pierre Sofa, now I think I might NEED it!
Her eclectic gallery wall is pretty perfect.

And how cute is that faux moose head?
 I must admit, I am still loving the ceramic animal trend.
Head on over to Glitter Guide to learn more about Devin’s home tour and see more pictures!

DIY Vintage Trailer Reveal!

I am excited about todays post.
My mom has been working hard at transforming her vintage trailer.
My parents purchased the trailer 10 years ago when they were building our family cabin.
It was parked on their lot and my whole family stayed in it for an entire summer.
Since then, my mom has always wanted to renovate it, and she finally got around to doing it this summer.
She kept the reno’s super simple, just new paint and fabric.
The power of a new paint job never ceases to amaze me.
I love the way it turned out.
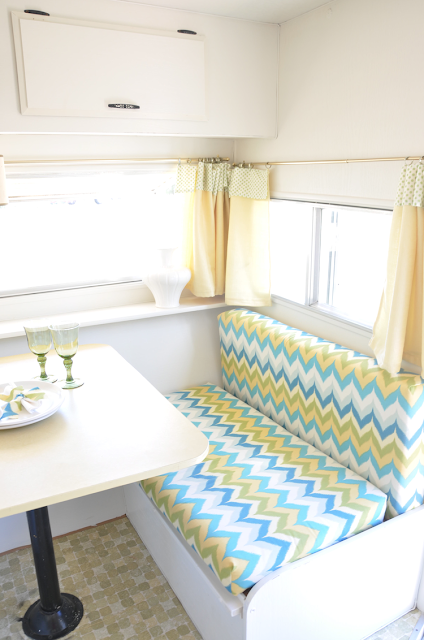
The blue, yellow, and white is clean and vintage looking.
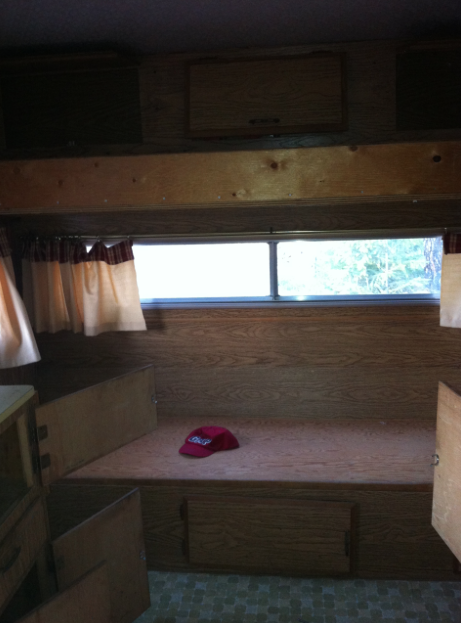
So much better than the original, don’t you agree?
For the interior, she painted all of the walls and cabinetry a crisp white.
A bold ikat chevron for the upholstery really transformed the space.
I love it.
The trailer originally was covered in dark wood paneling.
It’s almost hard to believe it is the same trailer!
Since she didn’t want to spend much on the renovation, she selected colors that would compliment the existing finishings and fixtures.
Now the original flooring, countertops, and appliances don’t look too shabby.


Isn’t is charming?

It originally had a bunk bed above the bench seating.
Since it was never used, my mom removed it which really helped open up the room.

So much better with it removed.
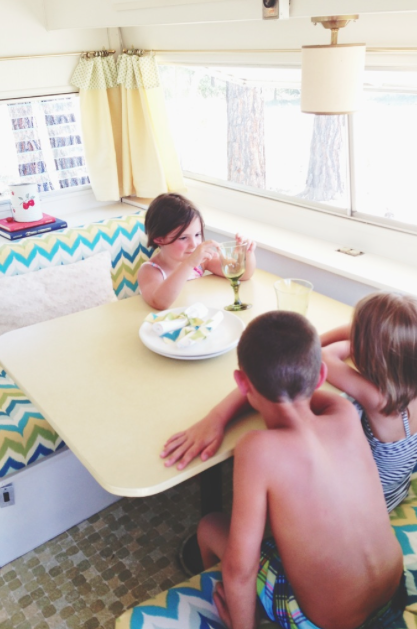
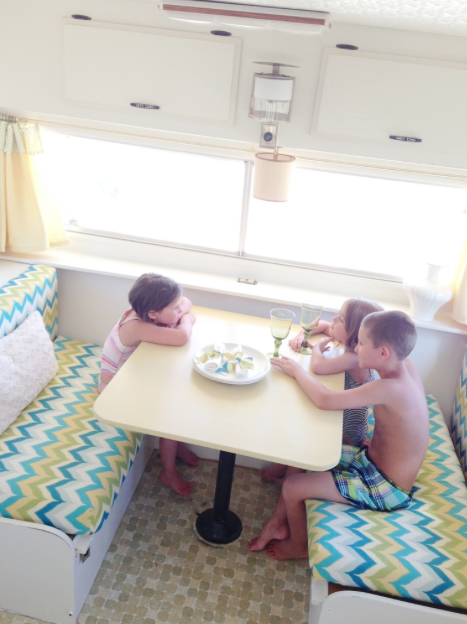
I am not the only one loving the trailers new look…

The kids have officially declared it their new playhouse.
I can’t think of a better use for it.
I think my mom did such a good job!
It also makes me want to renovate a trailer, don’t you agree?

DIY Temporary Decorative Panels

 So, I’ve got an idea…
Remember how I mentioned adding removable wallpaper to my television wall?
Well, turns out my wall is huge. It is about 16′ wide by 9′ tall. Which means it will require lots of wallpaper and end up costing more than I was hoping to spend. With our upcoming move to Orange County in 11 months, I just can’t justify spending much money on this little home.
With that being said, I also have an uncontrollable desire to constantly be improving/decorating my home.  
So, In order to get the best of both worlds and decorate inexpensively, I have to get creative.

The other day while cruising the aisles of Home Depot, I came across these large panels of styrofoam insulation with sound barrier foil on them.
They are 4′ wide by 8′ tall, weigh about 3 pounds each, and are only $10.00 a panel.
This got me thinking.
What if instead of covering the whole wall in wallpaper, I only covered a couple panels and attached them to the wall?
Or better yet, what if I painted and stenciled on the panels instead of purchasing wallpaper?
{image via here}
Since purchasing the wallpaper would cost about $300+ dollars, and I could potentially get the same look stenciling for under $50.00. Hmm….

{image via Full House}
I could either do 2 separate panels or push them together and do one large one.
{image via here}
And since the foam panels are so light, I could simply nail them to the wall.

{image via here}
Now I just need to select the perfect wall stencil, by far the hardest part.
So, what do you think? Good or crazy idea?
Anyone used these styrofoam boards before? 

DIY Abstract Art Tutorial

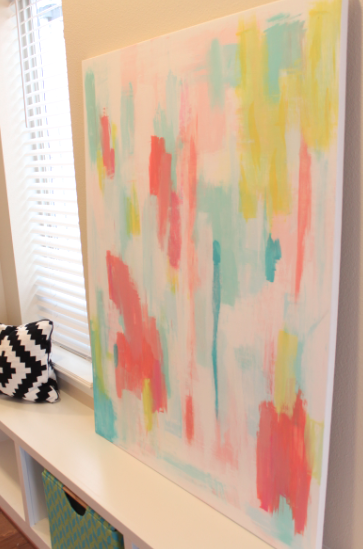
I finally finished my first DIY for my new little home.
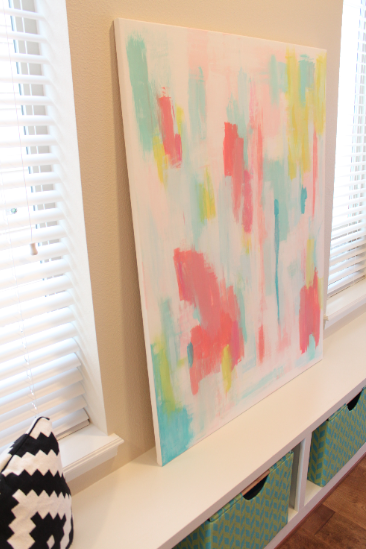
A little abstract art for my entry!
It wasn’t easy. Actually is was SO much harder than I ever imagined. Who knew throwing a little paint onto a canvas would prove to be so difficult?! I now have so much more respect for artists, it is a talent that I wish I possessed!
My art piece did not turn out like I envisioned. It is far from perfect and done without proper technique, but I kinda like it.
It adds a little color and life to my entry, exactly what it needed.
This is actually the same canvas I painted my DIY ombre art on.
 I just re-painted the canvas white and started over…which made this project cost very little.
 

I am happy with the color scheme, it’s packed full of all of my favorite colors.

It still needs to be hung, but its large scale is perfect for between the windows.

Now I need to find the perfect fabric for the bench!

For those who are interested, here are the paints that I used.
They are acrylic and I bought them at Walmart for 55 cents each.
It cost me under $8.00 for all of them.
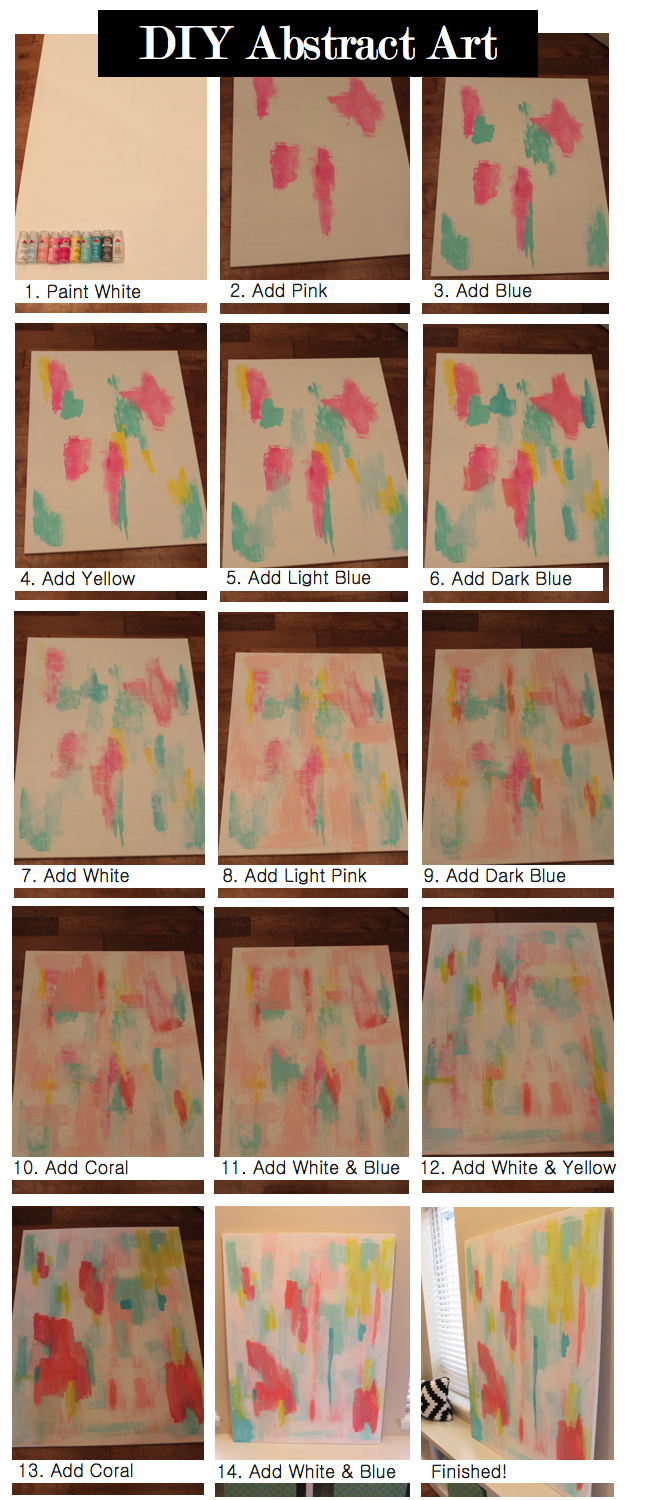
 I also included a quick little picture tutorial.
I had NO idea what I was doing, but here are the steps I took to create my abstract art.
The end steps are a little tricky to follow, but if you look closely you should be able to get the general idea.
Although this project seemed overwhelming at first, I am really happy I finally did it!
I also can’t complain about a huge piece of art for $8.00!