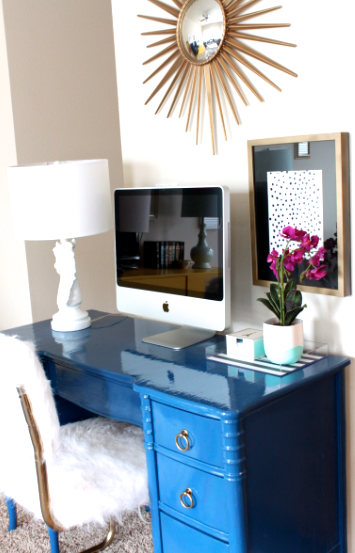
On Monday I shared my new $20.00 DIY desk chair.
As promised in the post, today I sharing the tutorial for the black & white dotted art that hung above the desk.
This project is super simple. So easy that I am pretty sure my 5 year old girl could do it!
I had everything I needed for this DIY on hand, so the cost to me was nothing.
You know I like that.
Are you ready?
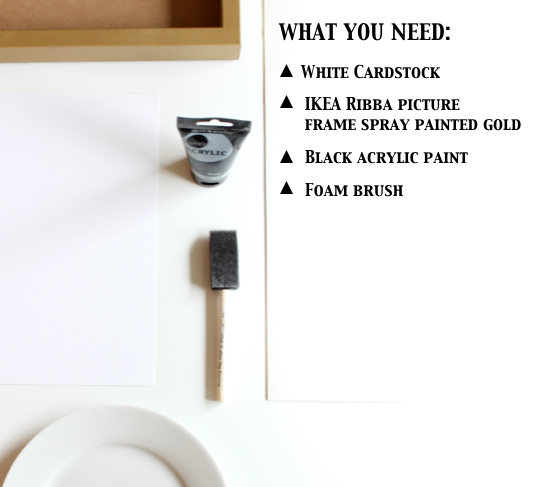
1. I used the bottom of my cheap-o foam brush to make the dots.
I simply dipped it into the paint, made sure it picked up lots of paint, and pulled it out.

Notice in the photo above that the paint forms a peak on the end of the brush.
Tip: The more paint the easier it is to create the smaller dots.
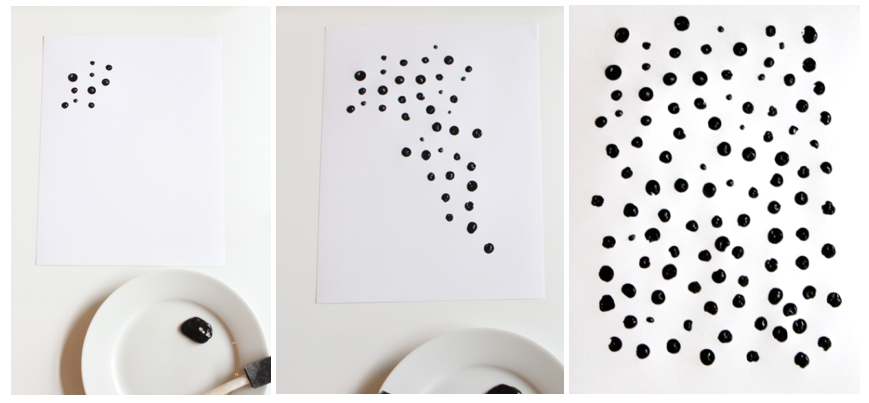
2. Get your dotting on. It doesn’t have to be perfect or have any pattern.
Just go for it!
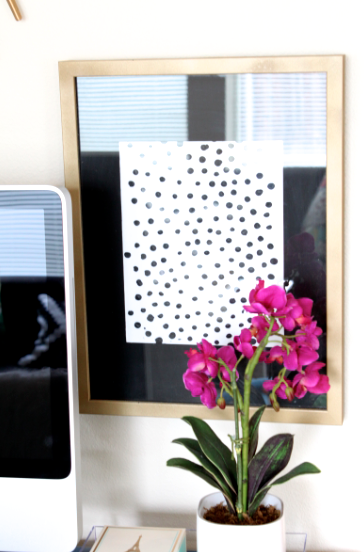
3. Frame it!

I love it paired with the gold frame and white mat, but when I hung it on my wall it didn’t feel right. (plus IKEA mats are much more cream than white!)
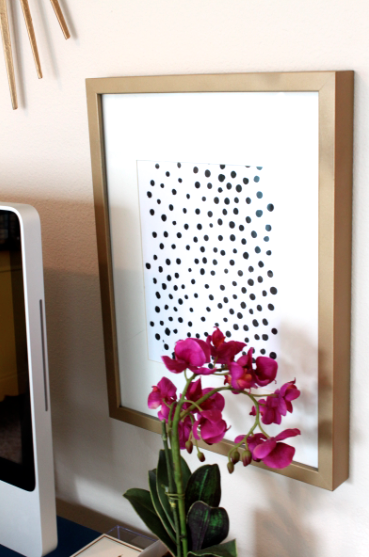
So, I got an idea…paint the mat black!
I took the art out of the frame, removed the mat, and started painting.
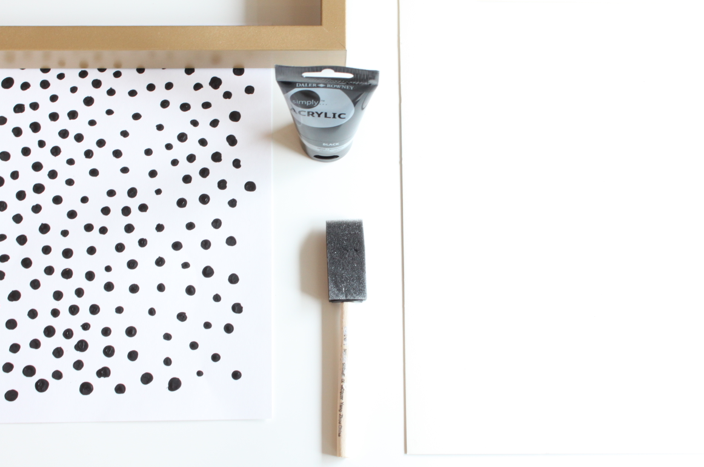
I used the same black acrylic paint as my art.
It painted great but did bend the mat when it dried.

Once I placed the mat in the frame, the weight of the picture frame backing flattened it out.
Tip: although I love the look, the black mat shows every single piece of dust that it collects. Patience is needed when assembling. 🙂

After a few naughty words I got the mat in without any dust!
I am in love!
I am pretty sure it is just what my wall was calling for.

I love how it adds a punch of personality but is still so simple.
I think it is fun to see how much impact a mat can have on a piece of art.
If you ever feel like your art could use a little updating, you might want to consider just switching out the mat!

So what is your preference?
White or black mat?
xo,

Loving the black matte! So much more pop. Did you rub and buff or spray paint the gold on the frame? Love this art!
I used spray paint. Rust-oleum metallic gold spray paint!
The black is edgy but I prefer the white, myself! I’ve seen this diy art around but really like your version! What gold spray paint did you use?
Rust-oleum metallic gold spray paint!
I like both! Using a combo of the two would make nice for a wall gallery. Thanks for sharing! Love this simple yet impactful piece of art!
Love, love, love it!
Love, love, love it!
So cute. Both mattes are great to me.. but the black is a little more interesting. Great style as usual!
Love it! Like the white on white the best.
-Trish
I like the white and the black truly. I think they both work but I know what you mean about the ikea ones.. not very white. You always have the best simple projects and this one is no exception!
I like the white and the black truly. I think they both work but I know what you mean about the ikea ones.. not very white. You always have the best simple projects and this one is no exception!
I love this. I cannot decide which one I like better. Both are super chic!
Yes, inquiring minds would love to know your fav gold spray paint.
I used Rust-oleums Metallic Gold spray paint!
So…what spray paint did you use…JUST Kidding. I agree, the Ikea mats are too cream. I usually go down to Michaels and buy there ready made double white and black mat with my coupon. I bought the West Elm gold frames and I was shocked on the mat they used. A flimsy piece of cardboard with a linen like fabric spray glued to it. Love the art work, simple yet stunning.
I think my wall is calling for the same thing! I actually like both black and white. Can’t decide!
I love both! I am going to do this project for sure since I have all the supplies on hand too! Thanks for the inspiration! xo
Your art looks like two Premier Fabrics Togo print pillows I have in my living room. What is up with IKEA and their creams instead of whites? Mats, rugs, pillows, etc. Ugh! I am creating a gallery wall in my living room and was about to hang one of my RIBBA frames but the mat looks awful with my other white art. I’ve been thinking of spray painting it.
Could you please tell me where your starburst mirror is from?
Thanks for the design inspiration.
It is from Home Depot!
If you want a mat to stay flat, paint the backside with any color or use the same color as the front of the mat. Let it dry then put your desired color on the front of the mat. The weight of the back paint will counterbalance the front paint and the mat will dry flat. Love your project and the black mat is outstanding.
I love it paired with the gold frame and white mat, but when I hung it on my wall it didn’t feel right. … blackandwhiteframedart.blogspot.com